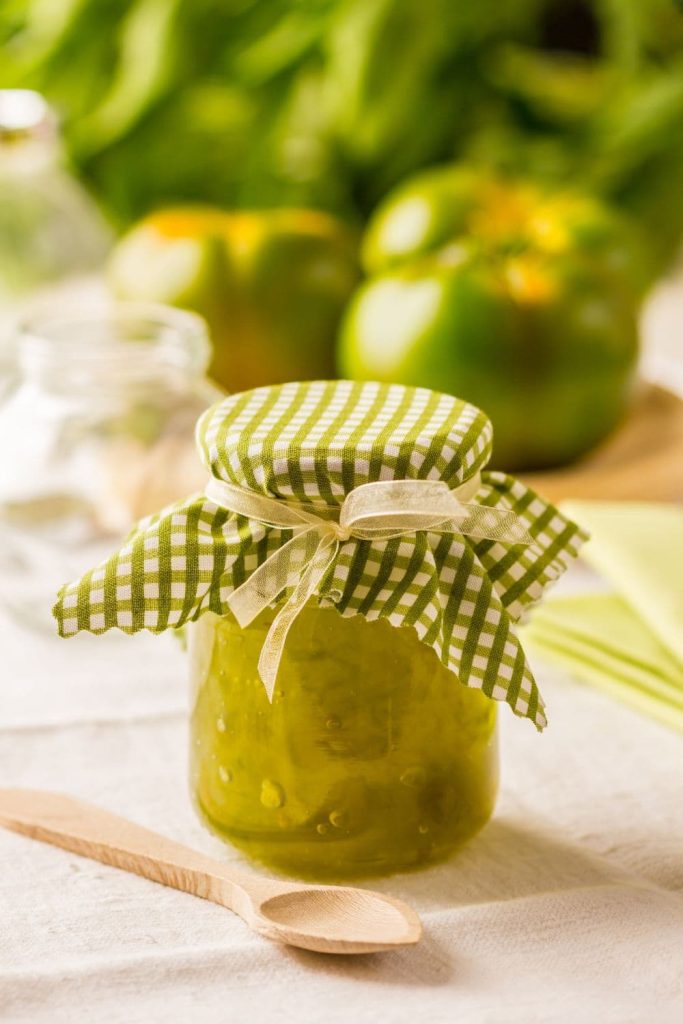
The Mary Berry Green Tomato Chutney is a classic preserve that captures the tangy flavour of unripe tomatoes with the warmth of spices and the sweetness of sugar. With its rich, glossy texture and balanced taste, this chutney is perfect for spreading on cheese sandwiches, serving with cold meats, or adding to a ploughman’s lunch. It takes a little time to cook down, but the reward is jars full of homemade goodness that keep for months.
What is Mary Berry Green Tomato Chutney?
Green tomato chutney is a traditional British preserve made by slow-cooking unripe tomatoes with onions, apples, vinegar, sugar, and spices. Mary Berry’s version is well-balanced, simple to prepare, and results in a chutney that is tangy, slightly sweet, and aromatic.
Other Popular Recipes
- Jamie Oliver Stuffed Marrow
- Hairy Bikers Stuffed Marrow
- Mary Berry Stuffed Courgettes
- Jamie Oliver Green Tomato Chutney
Why You Should Try This Recipe
- Great way to use unripe tomatoes – No need to waste end-of-season crops.
- Long-lasting preserve – Once sealed, it keeps for months in a cool cupboard.
- Versatile condiment – Delicious with cheese, meats, pies, and sandwiches.
- Simple ingredients – Uses pantry staples and garden produce.
- Homemade charm – Far tastier and fresher than shop-bought chutneys.
Ingredients Needed for Mary Berry Green Tomato Chutney
- 1.5 kg green tomatoes, chopped
- 500g onions, finely chopped
- 250g cooking apples, peeled, cored, and chopped
- 250g soft brown sugar
- 300ml malt vinegar
- 150g sultanas or raisins
- 1 tsp ground ginger
- 1 tsp mustard seeds
- 1 tsp mixed spice
- ½ tsp ground cloves
- 1 tsp salt
Kitchen Equipment Needed
- Large heavy-bottomed saucepan or preserving pan
- Wooden spoon
- Sharp knife and chopping board
- Sterilised glass jars with lids
- Ladle and funnel for filling jars
Instructions to Make Mary Berry Green Tomato Chutney
Step 1: Prepare the ingredients
Chop the green tomatoes, onions, and apples into small, even pieces to ensure they cook down evenly.
Step 2: Combine in the pan
Place tomatoes, onions, apples, vinegar, and sugar into a large pan. Stir over a low heat until the sugar dissolves.
Step 3: Add the flavourings
Stir in the sultanas, ginger, mustard seeds, mixed spice, cloves, and salt. Mix well so the flavours distribute evenly.
Step 4: Simmer the chutney
Bring the mixture to a gentle boil, then lower the heat and simmer uncovered for 1½ to 2 hours. Stir occasionally until the chutney is thick and glossy with no excess liquid.
Step 5: Test for readiness
Drag a spoon across the bottom of the pan; if the chutney leaves a trail without liquid rushing in, it’s ready.
Step 6: Pot into jars
Ladle the hot chutney into sterilised jars, leaving a little headspace. Seal immediately with lids.
Step 7: Store and mature
Leave the chutney to mature for at least 4–6 weeks in a cool, dark cupboard before eating for the best flavour.
What to Serve With Mary Berry Green Tomato Chutney
- Cheese board favourite – Perfect with mature cheddar or stilton.
- Ploughman’s lunch – A traditional partner for bread, ham, and pickles.
- Cold meats – Delicious with turkey, pork, or leftover roast beef.
- Sandwich spread – Adds tang to cheese or ham sandwiches.
Pro Tips for Making the Best Mary Berry Green Tomato Chutney
- Chop evenly – Small, uniform pieces help the chutney cook down smoothly.
- Use a heavy pan – Prevents sticking and ensures slow, even cooking.
- Sterilise jars properly – Essential for safe, long-lasting preserves.
- Be patient – Cook low and slow for deep, well-rounded flavours.
- Don’t rush the maturing – Let the chutney sit for a few weeks to develop fully.
- Adjust spices – You can add chilli flakes for a spicier kick.
What are Variations of Mary Berry Green Tomato Chutney
- Spicy version – Add fresh chillies or cayenne pepper.
- Apple-heavy twist – Increase apples for a sweeter chutney.
- Herby chutney – Add fresh thyme or rosemary for extra aroma.
- Fruitier mix – Swap sultanas for dried apricots or cranberries.
How Do I Store Mary Berry Green Tomato Chutney
- Cool and dark storage – Keep sealed jars in a cupboard for up to 12 months.
- Refrigerate once opened – Store in the fridge and use within 4–6 weeks.
- Always use clean spoons – Prevents contamination and extends shelf life.
How Do I Reheat Mary Berry Green Tomato Chutney
Chutney is typically served cold, so reheating is not required. If you prefer it warm, gently heat it in a small pan on low for a few minutes, but avoid boiling as it may affect the flavour.
How Can I Make Mary Berry Green Tomato Chutney Healthier?
You can reduce the sugar slightly or replace part of it with honey. Using apple cider vinegar instead of malt vinegar can also make the chutney lighter and less sharp. Adding extra apples increases natural sweetness and fibre.
Nutrition Value (per serving – approx. 1 tbsp)
- Calories: ~40 kcal
- Protein: 0.3g
- Fat: 0.1g
- Carbohydrates: 10g
- Fibre: 1g
FAQs
Do you need to remove seeds from green tomatoes for chutney?
You don’t need to remove the seeds when making green tomato chutney. The seeds soften during the slow cooking process, blending into the chutney and adding texture.
How long should green tomato chutney simmer?
Green tomato chutney should simmer for 1½ to 2 hours on a gentle heat. It is ready when the mixture is thick, glossy, and no excess liquid runs across the pan when stirred.
Why does chutney need to mature before eating?
Chutney needs at least 4–6 weeks to mature so the flavours can blend and mellow. Freshly made chutney can taste sharp, but resting it in sealed jars allows the spices, vinegar, and sweetness to balance.
How do you stop green tomato chutney from sticking to the pan?
Cook chutney in a heavy-bottomed pan and stir it regularly, especially as it thickens. Keeping the heat low and steady prevents the mixture from catching at the bottom.
Final Words
The Mary Berry Green Tomato Chutney is a wonderful way to preserve the harvest and enjoy green tomatoes in a rich, flavourful condiment. It’s easy to make, keeps well, and transforms simple meals into something special. With patience and the right balance of flavours, you’ll have a chutney that rivals any shop-bought version.
PrintMary Berry Green Tomato Chutney

Green tomato chutney is a traditional British preserve made by slow-cooking unripe tomatoes with onions, apples, vinegar, sugar, and spices. Mary Berry’s version is well-balanced, simple to prepare, and results in a chutney that is tangy, slightly sweet, and aromatic.
- Prep Time: 20
- Cook Time: 105
- Total Time: 2 hours 5 minutes
- Yield: 6 Jars 1x
- Category: Preserve
- Method: Simmering
- Cuisine: British
Ingredients
-
1.5 kg green tomatoes, chopped
-
500g onions, finely chopped
-
250g cooking apples, peeled, cored, and chopped
-
250g soft brown sugar
-
300ml malt vinegar
-
150g sultanas or raisins
-
1 tsp ground ginger
-
1 tsp mustard seeds
-
1 tsp mixed spice
-
½ tsp ground cloves
-
1 tsp salt
Instructions
Chop the green tomatoes, onions, and apples into small, even pieces to ensure they cook down evenly.
Place tomatoes, onions, apples, vinegar, and sugar into a large pan. Stir over a low heat until the sugar dissolves.
Stir in the sultanas, ginger, mustard seeds, mixed spice, cloves, and salt. Mix well so the flavours distribute evenly.
Bring the mixture to a gentle boil, then lower the heat and simmer uncovered for 1½ to 2 hours. Stir occasionally until the chutney is thick and glossy with no excess liquid.
Drag a spoon across the bottom of the pan; if the chutney leaves a trail without liquid rushing in, it’s ready.
Ladle the hot chutney into sterilised jars, leaving a little headspace. Seal immediately with lids.
Leave the chutney to mature for at least 4–6 weeks in a cool, dark cupboard before eating for the best flavour.